Prototype PCB assembly forces an early procurement choice that affects cost, lead time, and component risk. You can either buy finished boards from a supplier or provide parts and let an assembler handle placement and testing, so weigh price, schedule, and who owns component risk to match procurement to your development stage. Below you’ll find direct comparisons of turnkey, consigned, and hybrid approaches plus a call-ready quick decision checklist to get realistic PCB assembly quotes fast.
Quick summary
- Decision drivers: align procurement to speed, cost, or component control so timelines and acceptable risks match your development phase.
- When turnkey wins: fastest path with minimal coordination, ideal for rapid iteration, tight deadlines, and supplier-managed sourcing.
- When consigned helps: lowers part markup and preserves BOM or IP control for long-lead sensors, licensed modules, or specialty RF components.
- Files & DFM: provide RS-274X or ODB++, Excellon, a clean BOM and stack-up, and run a brief DFM check to avoid rework.
- Quote checklist: request side-by-side turnkey vs consigned quotes with AOI/X-ray and test options plus domestic vs overseas lead times to compare real cost and schedule.
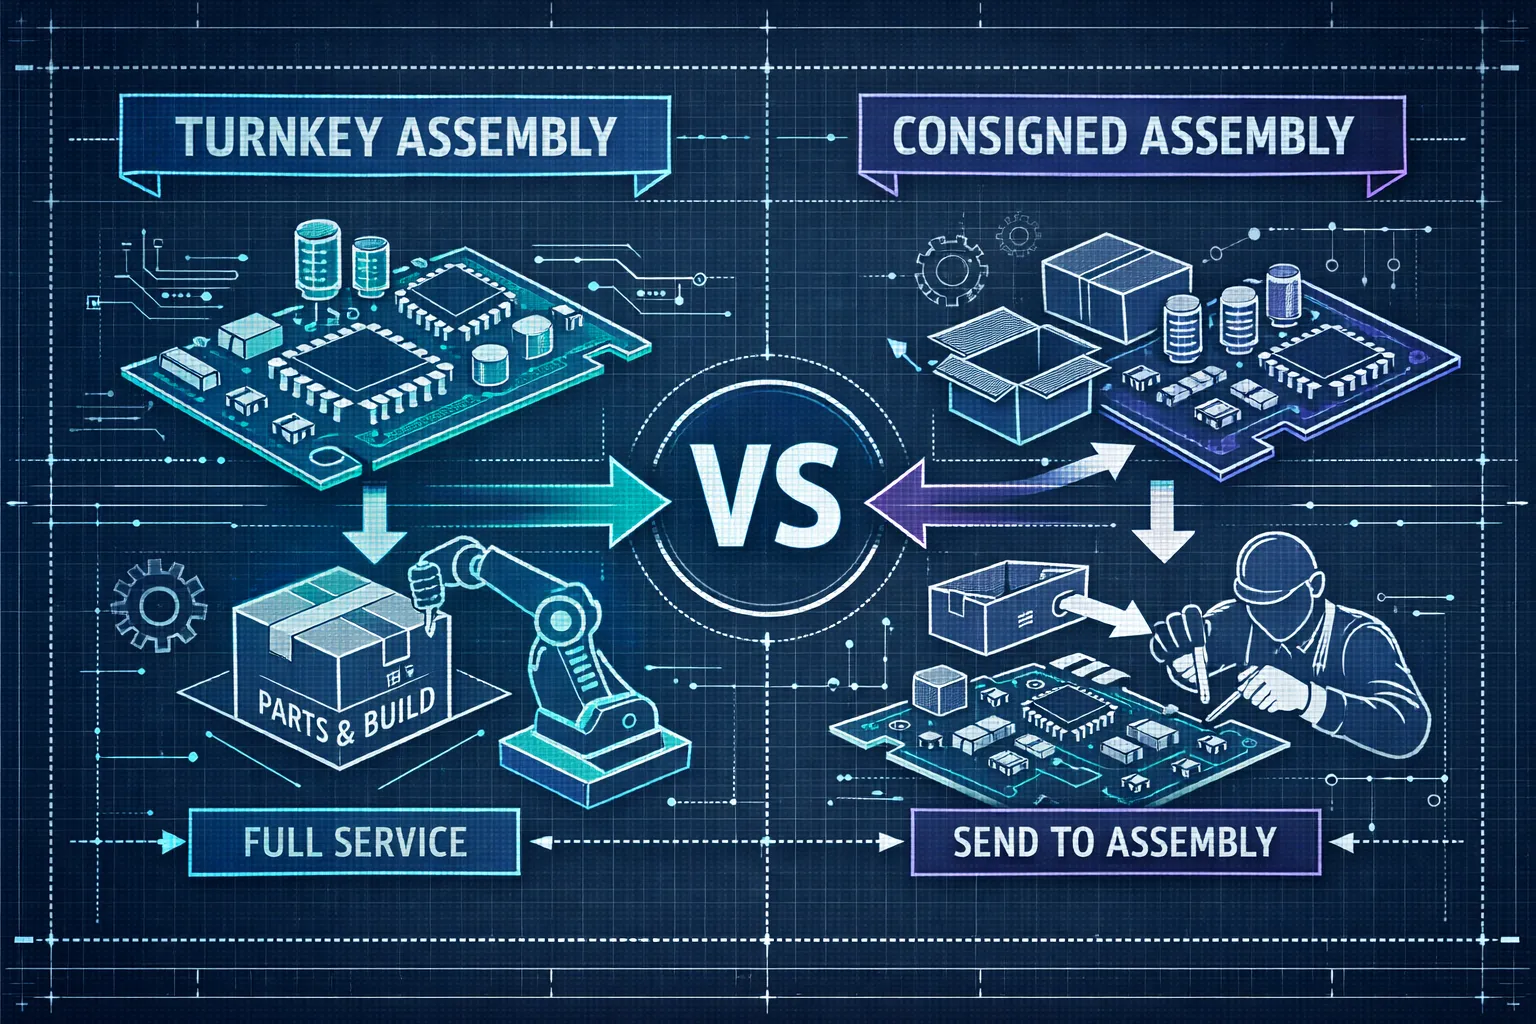
Choose turnkey or consigned for prototype PCB assembly
Choosing the right procurement model comes down to three priorities: speed, cost, or component control. Prototype PCB assembly sits in a tradeoff zone where lead time, supplier markup, and component risk interact, so align procurement with your project’s timeline and acceptable risk to avoid surprises during validation sprints. A clear procurement choice reduces last-minute changes and keeps iterations predictable.
If you need speed and a single point of accountability, choose turnkey. With turnkey PCB assembly the assembler sources all parts and delivers finished boards, which simplifies logistics and reduces the number of vendors to manage. Domestic quick-turn options can ship in roughly two to four days, though domestic prototype costs are typically higher than many overseas sources.
Consigned assembly lowers part markup and preserves BOM and IP control because you supply the components while the EMS handles placement and testing. Choose consignment for long-lead, proprietary, or certified modules where traceability or inventory control matters, or for low-volume runs backed by strong supplier relationships. Common parts to keep in-house include high-value sensors, licensed wireless modules, and long-lead RF components.
- Sensors and optical modules: high value and often proprietary.
- Licensed wireless or cellular modules that require certification and traceability.
- Long-lead RF items, custom dies, or parts with limited suppliers.
On your next EMS call, ask for total lead time including sourcing, clarify who owns component risk and warranty, and request separate turnkey and consigned pricing. Check expedited fees, MOQs, and traceability for serialized or certified parts. Troy offers hybrid sourcing where you consign critical items while Amtech sources the rest and provides a consolidated PCB assembly quote showing true cost and timing. For a practical comparison of procurement models and where each method typically wins, consider a detailed turnkey vs consigned EMS comparison.
Step-by-step workflow to get a prototype assembled fast
Use a compact playbook that turns your project brief into a buildable job and avoids long email threads and surprise iterations. Start with a quick DFM check so footprint, stencil, and panelization issues surface before procurement begins. The workflow below reduces quotation cycles and shortens lead time for prototype PCB assembly.
Before requesting pricing, assemble a complete file set so an assembler can provide an apples-to-apples quote. Include the BOM with preferred manufacturers and alternates, Gerbers or ODB++, pick-and-place files, and an assembly drawing that marks polarity and special notes. State target quantity, preferred lead time, shipping address, and whether parts are consigned or supplier-procured to speed quoting. If you want a broader overview while assembling your package, see the Electronics Assembly Services Buyer’s Guide for a checklist and explanation of each deliverable.
Run a short, collaborative DFM review with the assembler to verify footprints, stencil apertures, component spacing, and panelization before procurement starts. Expect prioritized fixes, alternate part suggestions that reflect your yield and schedule goals, and clear signoff criteria for any layout changes. The build phase sequences fabrication, sourcing, SMT placement, reflow, inspection, and any rework, with one or two rapid iterations typical for prototypes. Allow time for functional debug and firmware bring-up, and define acceptance criteria such as visual yield, ICT pass rate, and functional test steps. Clear acceptance criteria and a tight iteration loop speed the transition to validation-ready hardware.
Files and formats your assembler expects
Provide clear fabrication data so job review does not stall. Send RS-274X Gerbers or ODB++ including copper, solder mask, paste, and silkscreen layers, plus Excellon drill files and a layer map or stack-up. Name files consistently and include a short fabrication note with material callouts and any critical impedance or finish requirements to cut quoting time and prevent misreads. If you need step-by-step guidance on generating a correct PCB assembly file set, this how-to guide for PCB assembly files is a helpful reference.
Supply the BOM as a CSV or Excel file with columns for reference designator, quantity per board, manufacturer, MPN, alternates, package, preferred footprint, and unit price estimate. Add a Consigned column and a Preferred Vendor field if you manage parts to speed sourcing. Export BOMs without merged cells and use plain ASCII headers such as Designator,Qty,MPN,Manufacturer,Package,AltMPN,Price,Consigned to simplify parsing and avoid manual clean-up.
Export pick-and-place (centroid) files as CSV with headers like Designator,MidX(mm),MidY(mm),Rotation(deg),Layer and use millimeters when possible. State the origin convention explicitly, whether the origin is board center or lower-left, and indicate rotation direction. Flag special requirements in an extra Nozzle or Comment column and mark top/bottom in the Layer field so placements and fiducials match CAD output.
Attach an assembly PDF calling out polarity, pin 1, programming pads, mechanical keep-outs, and test points, and include STEP files when enclosure fits are tight. Add a short test plan for flying-probe or functional test and a simple README that lists file versions, units, and contact information. Those conventions help move designs to low-volume or quick-turn PCB assembly without manual back-and-forth before procurement.
DFM fixes that cut rework and reduce cost
Use a short, tactical checklist to target layout changes that save hours on the shop floor. The practical rules below help avoid surprises before the first reflow; run each subsection in under 30 minutes to cut iterations and lower per-board cost on your next prototype PCB assembly job. Apply fixes before ordering stencils or panels to avoid day-long rework cycles. For a concise set of assembly best practices to pair with these DFM checks, review the Top 5 Electronics Assembly Best Practices for 2026.
Prioritize surface-mount components and minimize through-hole where layout allows, since surface-mount runs are automated and cheaper per board. If through-hole is required, group all THT work on one side to avoid hybrid processes that add handling, fixtures, and cost. Where possible, move bulky connectors or anchors to mechanical subassemblies to simplify SMT runs.
Standardize parts and footprints to reduce sourcing and changeover time. Favor common packages such as 0603, 0805, and 1206 and list at least two approved manufacturers for critical parts so procurement does not stall. Run this quick checklist now:
- Replace oddball packages with standard equivalents.
- Add two alternates in the BOM for each critical part.
- Confirm footprints match the assembler’s library.
Tighten pad, stencil, and panel rules to prevent failures that cause rework. Check pad-to-pad spacing and solder mask clearances, tune stencil apertures for fine-pitch parts, and review thermal pad breakout for BGA thermal relief. Include fiducials, assembly orientation marks, and accessible test points to speed small-batch assembly and improve throughput.
Estimate lead times and cost: domestic vs overseas
When speed matters, domestic vendors usually win for total cycle time. Simple two-layer boards can be completed in 24 to 72 hours domestically, with three to five days common for more complex four-layer designs. Overseas fabs may finish board fabrication in one to three days, but international logistics and customs typically extend total delivery to five to ten days or longer. Component availability is the single largest cause of delay, so assume sourcing can add days or weeks if parts are not stocked. For a practical breakdown of typical PCB assembly lead times and what affects them, see this PCB assembly lead time guide.
For a five to ten board batch, expect a domestic total around $300 to $800, or roughly $50 to $150 per board, while many overseas suppliers quote $80 to $250 for the batch before shipping and duties. Add shipping, duty, and testing and the landed cost gap narrows: a $150 overseas batch plus $60 expedited shipping and eight percent duty lands near $230. Always include testing, tooling, and quick-turn premiums when estimating final prototype cost.
Sourcing choices shift both schedule and price. Using stocked parts or a turnkey vendor reduces procurement work but can add days when parts must be ordered to spec, while priority sourcing shortens lead time at a 10 to 30 percent surcharge. If you need rapid iterations, prioritize domestic quick-turns and accept higher per-unit cost; if you need the lowest landed cost and can tolerate longer cycles, consider overseas sourcing.
Inspection, testing and requesting an accurate quote
Pick inspection and test options that match project risk and budget. AOI is the baseline visual inspection for surface defects and suits most prototypes, X-ray uncovers hidden BGA and CSP joints, and flying-probe or in-circuit test (ICT) validate electrical nets. ICT requires fixtures that add a one-time cost, whereas functional testing verifies system behavior and often delivers the best value when priced properly. For a complete testing strategy covering AOI, X-ray, and ICT, see this AOI, X-ray, and ICT testing guide.
- Gerber / ODB++
- Complete BOM with alternates and consignment notes
- Pick-and-place and assembly drawing
- Target quantities, lead time, and test requirements
- Functional test script and acceptance criteria
- Shipping address and authorization to source parts if desired
Use this email template and checklist to get comparable vendor responses: Subject line with project name and “Quote request,” and a body that lists project name, target units, and desired ship date. Attach BOM, Gerbers, pick-and-place, and the assembly drawing, and note whether parts are consigned or if you authorize sourcing. Ask vendors to break out parts, assembly, testing, and any quick-turn premiums, and confirm AOI/X-ray needs, ICT or flying-probe scope, and the presence of a functional test script. Copy and paste this into your RFP to get straight, comparable quotes fast.
Next step: gather your Gerber files, BOM, target quantities, and preferred lead time, then request a side-by-side turnkey versus consigned quote from Amtech. We will run a quick DFM check and present the trade-offs in cost and lead time so you can decide with confidence. Prepare your files and submit them to Amtech for a fast, actionable estimate.